Video Tutorial
If you are from India or if you know the Hindi language, you can follow the video by watching it. If not, you can scroll down below
What is L3MON
L3MON was created with NodeJS. It provides customers with a powerful and user-friendly web-based interface that makes network management and monitoring simple and accessible from anywhere in the world. Whether you’re an IT specialist managing a business network or an interested home user delving into the nuances of your network, L3MON provides an extensive toolkit to simplify your network management chores.
How To Install L3MON In Termux
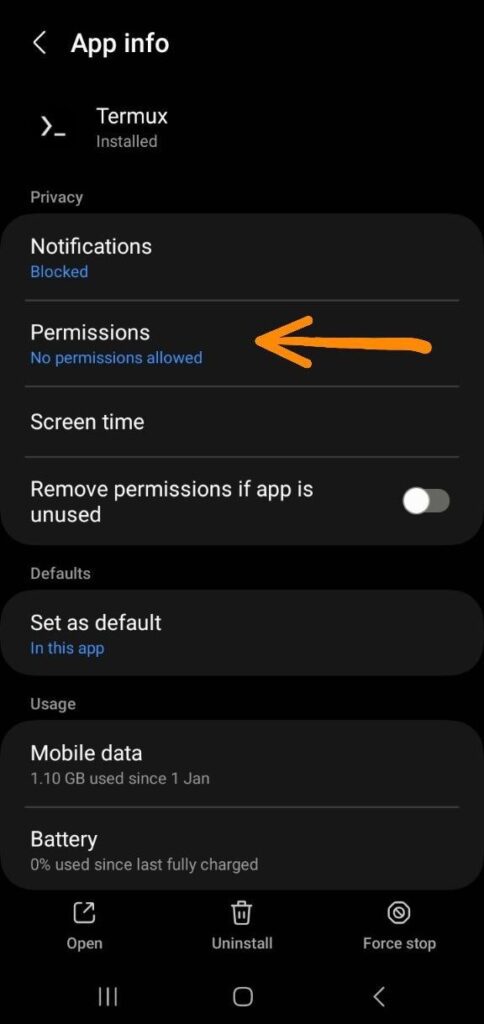
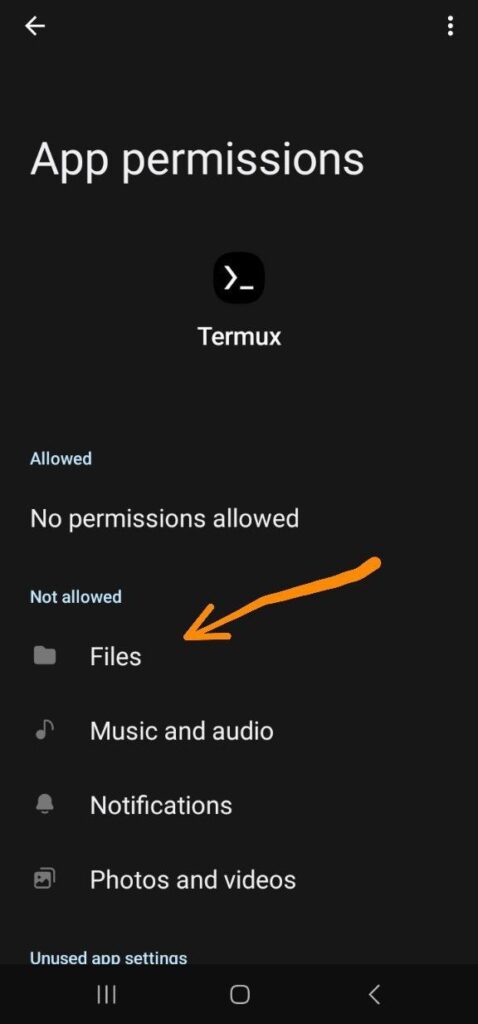
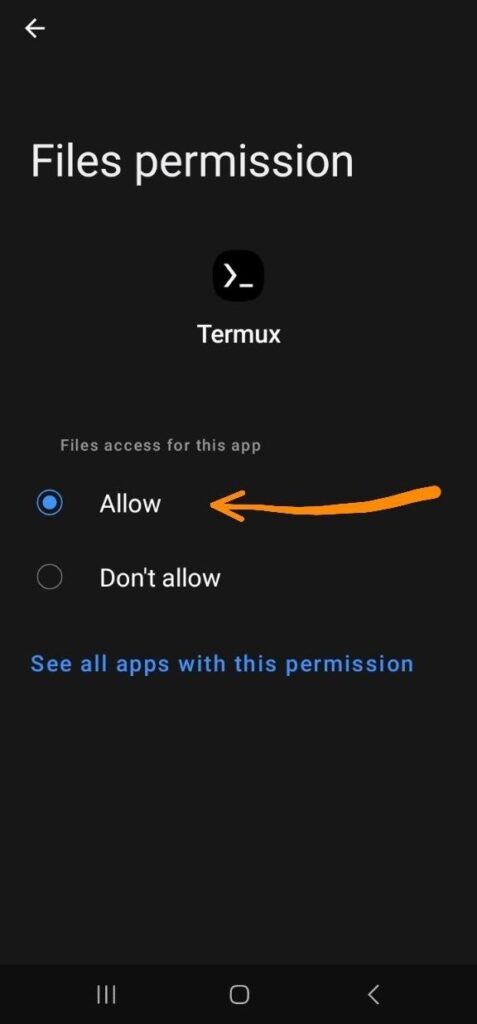
Step 1: Give Storage Permission
The first thing you need to do is give storage permission to Termux. After giving permission, completely close and restart your Termux once. Make sure it should also be closed from the background
Step 2: Update and Upgrade Termux
Now, perform ‘apt update’ and ‘apt upgrade’, and remember, do not proceed until ‘apt update’ and ‘upgrade’ are completed successfully because sometimes errors occur during ‘apt update’ or ‘upgrade’ in Termux. Use This:
apt update && yes | apt upgrade
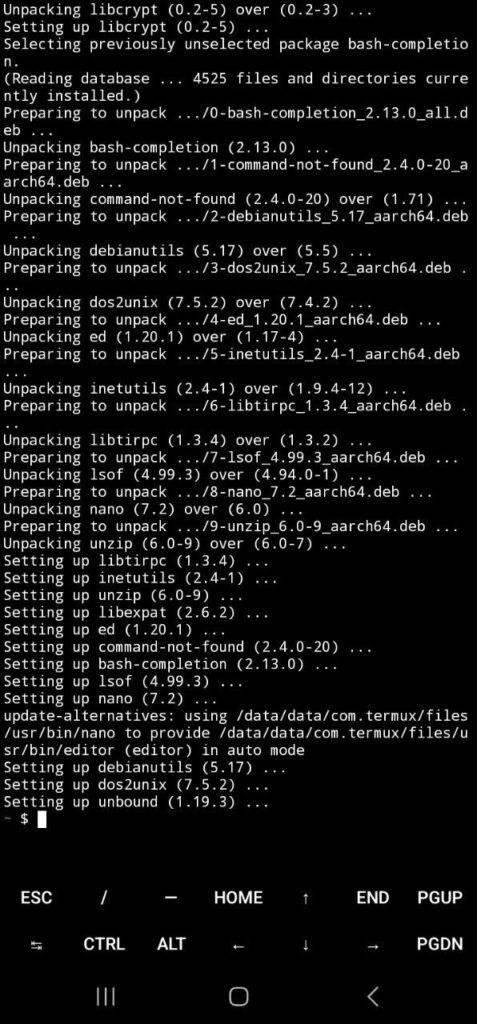
Step 3: Install L3MON
Once ‘apt update’ and ‘upgrade’ are done successfully, paste this command into Termux and run it. With these commands, the L3mon tool will be installed properly in your Termux, and Java packages will also be installed. You don’t need to do anything manually. Copy and paste the entire command, and one important thing, the repository from which I have taken this L3mon has been backed up. If you want to download the backup, its link is also below. But before downloading, make sure to turn off your ad blocker
apt-get update -y && apt-get upgrade -y && pkg install git -y && git clone https://github.com/TheBizarreAbhishek/L3MON.git && cd L3MON && bash lemon.sh
Step 4: Configure Login Credentials
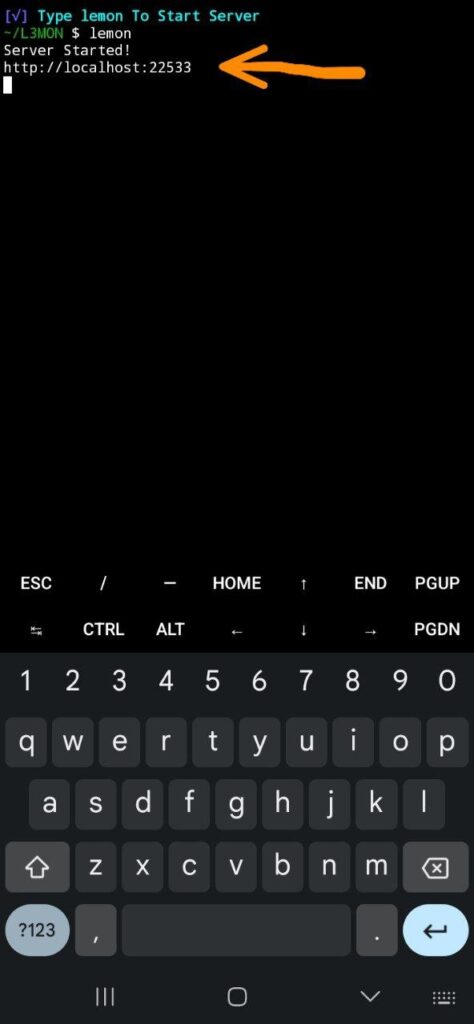
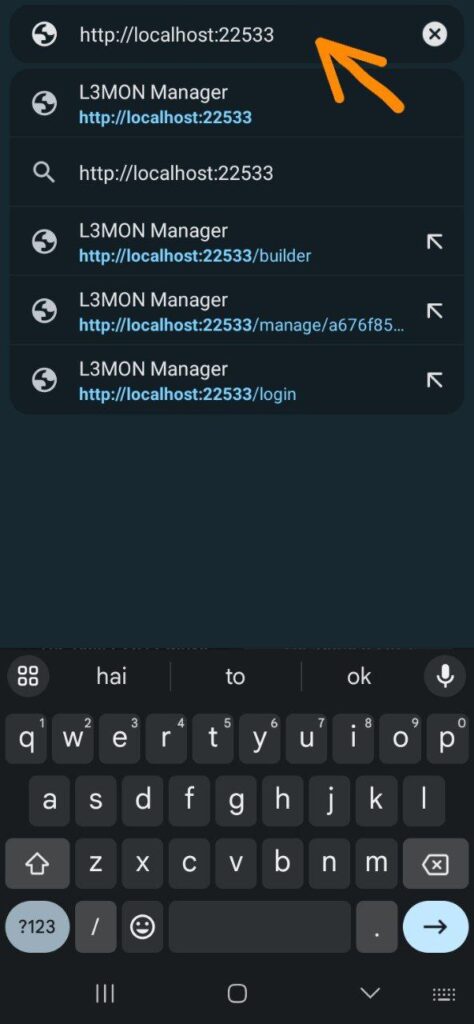
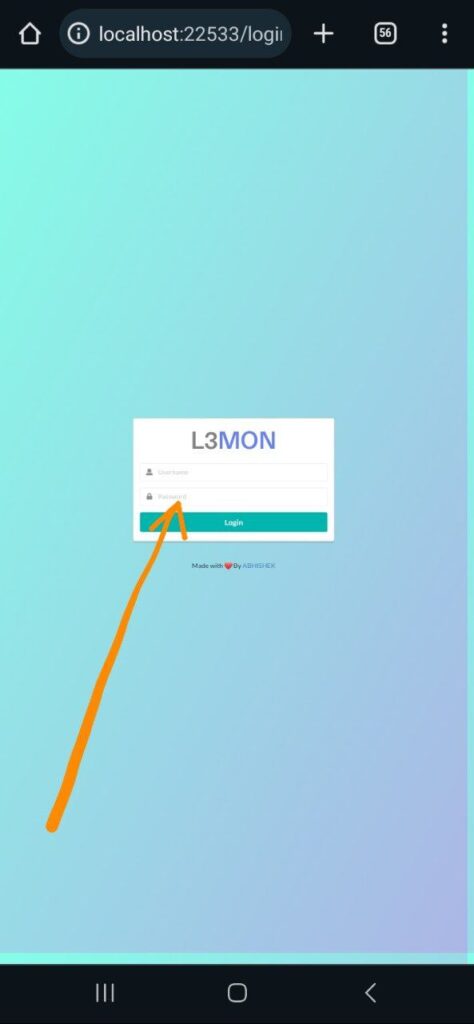
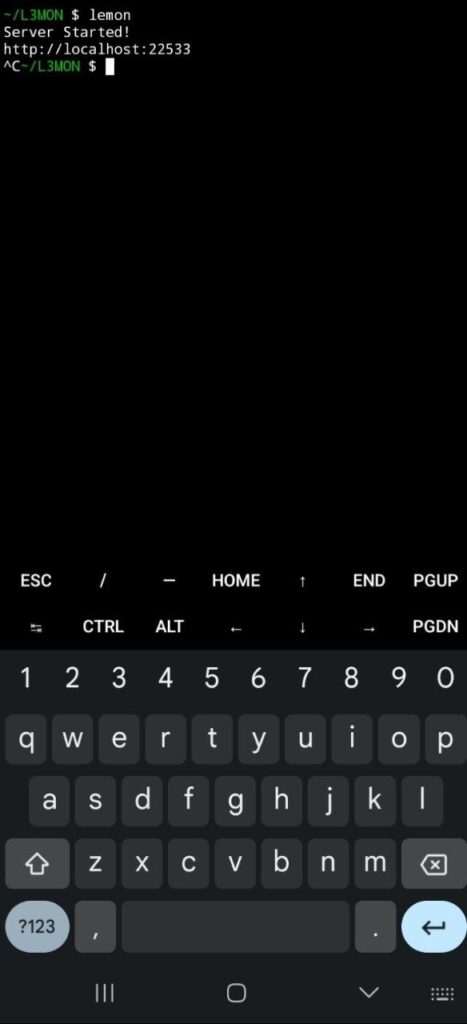
Once all your commands execute correctly, you’ll navigate to the L3mon directory, and to run L3mon, you’ll need to type ‘lemon’. However, sometimes you may encounter errors even after typing ‘lemon’. In such cases, uninstall Termux once, reinstall it, reinstall L3mon, and then try typing ‘lemon’ again. Once it runs successfully, you’ll see ‘server started’ written, along with a URL provided. Paste that URL into your phone’s browser, and your L3mon page will start. But for now, you won’t be able to log in. To set up a login, once the server is running, type in a username and password. After confirming that the page opens in the browser, return to Termux and stop the server. To stop the server, type ‘ctrl + c’. Once the server is closed, you’ll need to edit the login script using the following command:
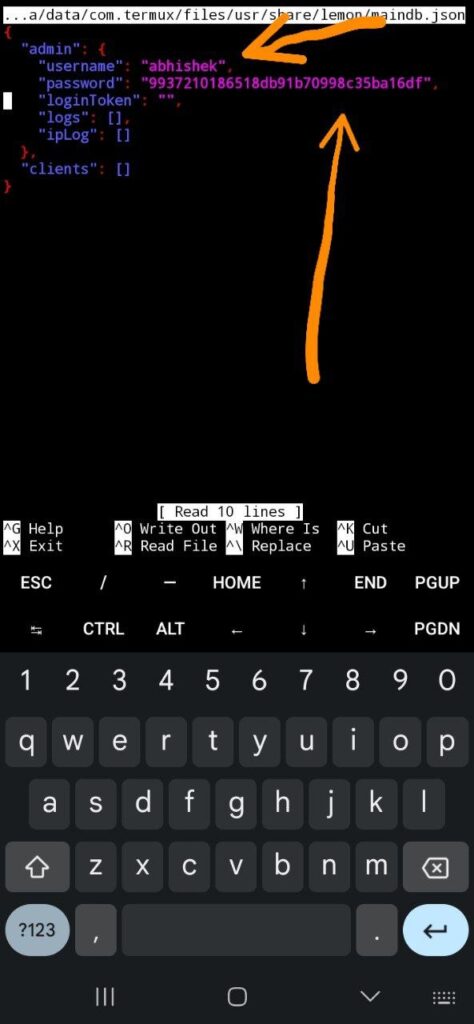
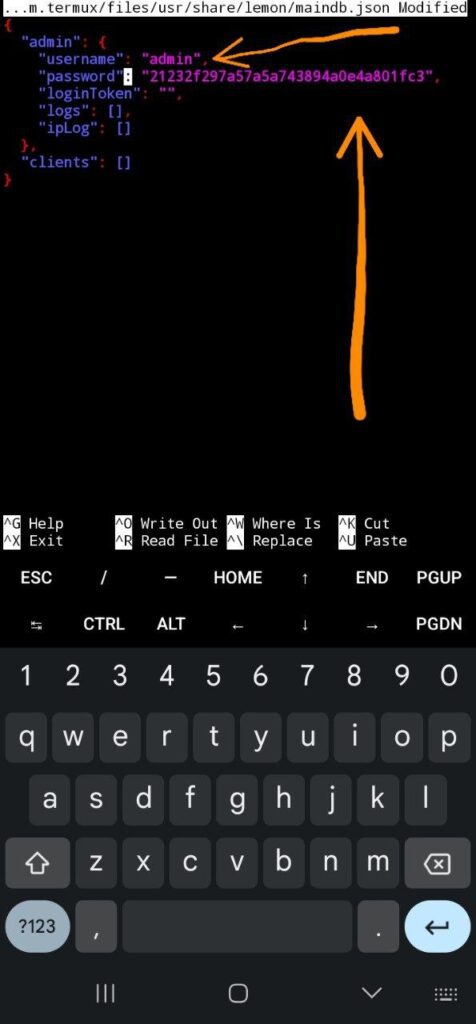
nano /data/data/com.termux/files/usr/share/lemon/maindb.json
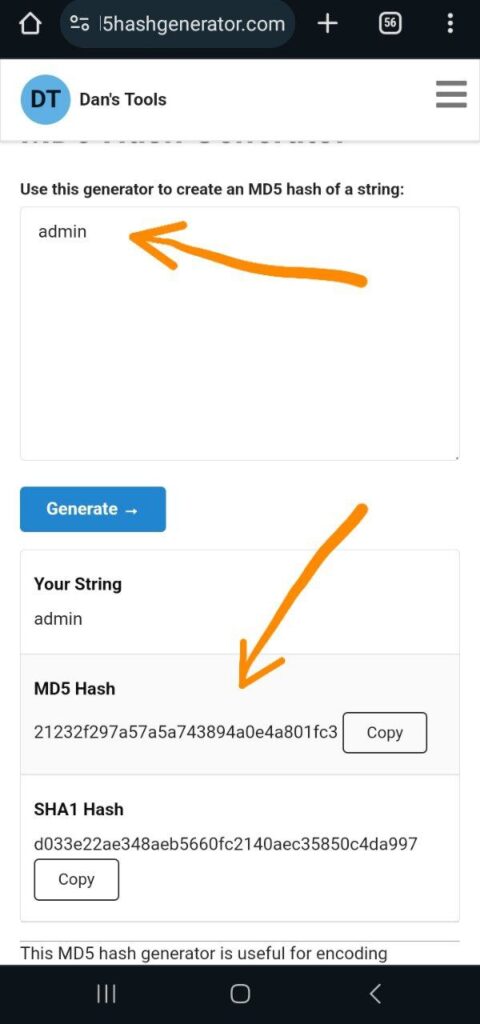
Once you’ve entered this command and pressed enter, you’ll see a script where you can set a username and password. You can choose any username you like; I’ll use ‘admin’. The password will be in MD5 hash format. For this, you can use an MD5 hash generator website: MD5 Hash Generator. Once you have generated the MD5 hash, copy it and paste it correctly into the file where the password is supposed to go. Save the file by pressing ‘ctrl + x’, then ‘y’, and finally ‘enter’. Now, your login credentials are ready to be used in L3mon
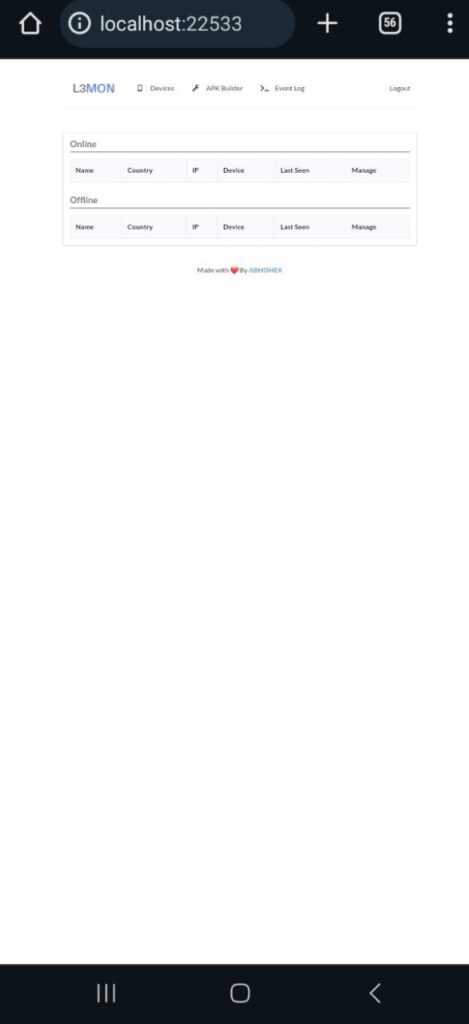
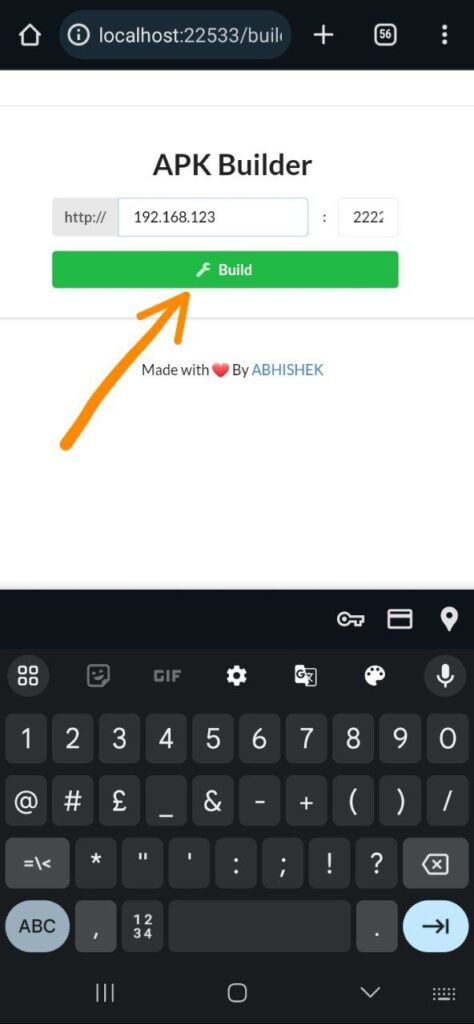
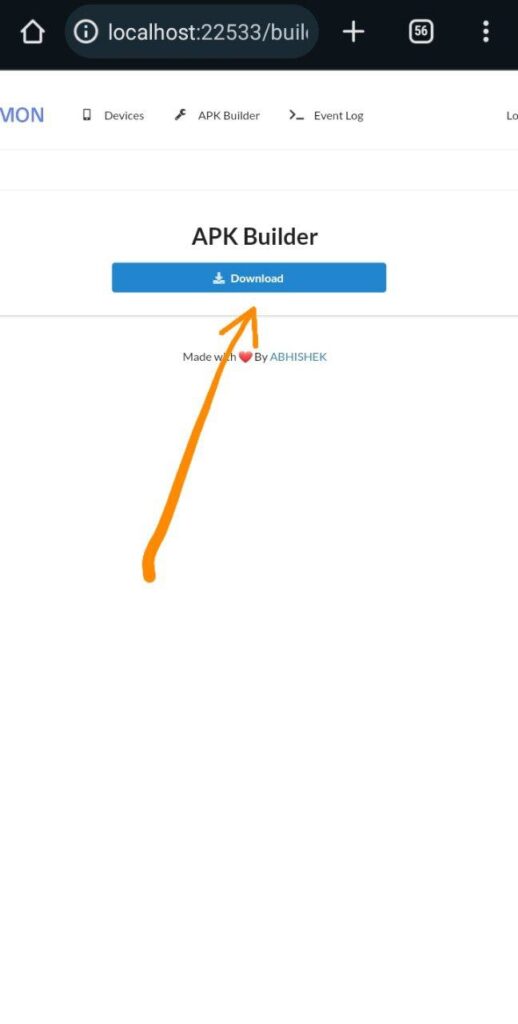
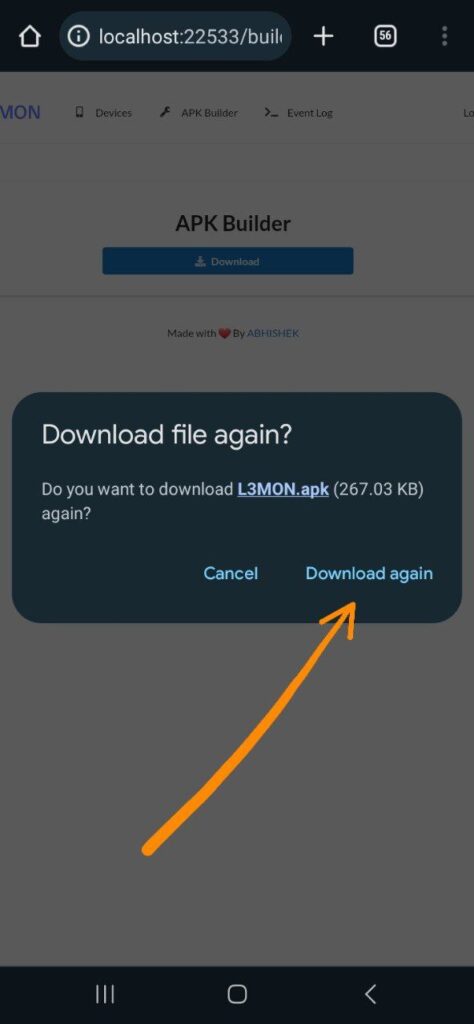
Step 5: Login and Create Payload
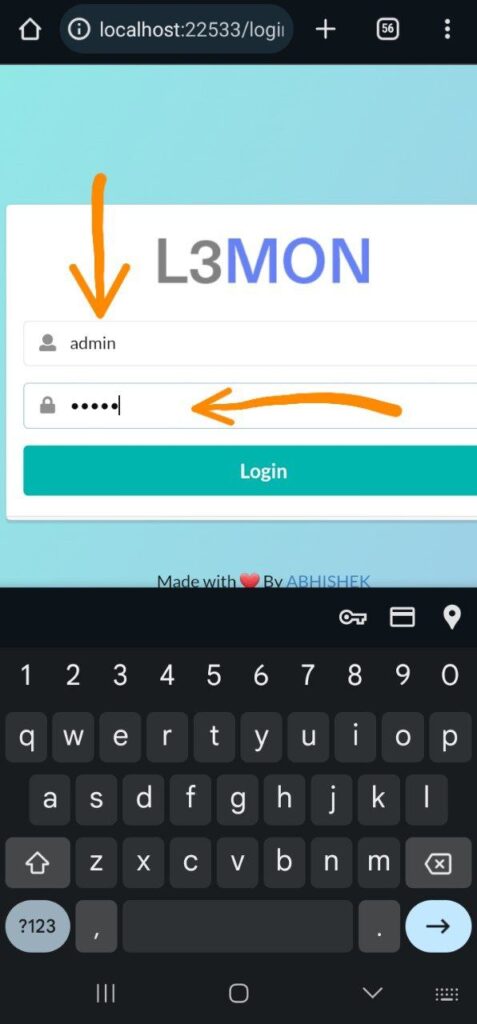
Now, start the L3mon server again and log in with your new credentials. Your L3mon login should be successful. If you’re unable to log in, understand that there might be an issue somewhere in the process. Double-check all the steps. Once logged in, you can create a payload APK here. You can see an example in the image below
Conclusion
Enjoy!